How-to: Installing SQL Server 2016 Standard Edition Introduction This document describes the installation of SQL Server 2016 Standard Edition. The installation procedure for the Enterprise Edition is similar, but some screens may differ. Before installing, you should have, at the very least Exact Globe Next product update 409 and Exact Synergy Enterprise product update 254 to work with SQL Server 2016. In these following steps, it is assumed that you are installing the SQL Server as a new installation or as a new instance: - For a new installation, there is no MS SQL Server software present in your system. After the installation, you will have one MS SQL Server.
- When installing a new instance, install MS SQL Server next to your current MS SQL Server version. After the installation, you will have multiple MS SQL Servers; the one you have just installed, and the existing one(s) present in your system.
Keep in mind: It is not possible to install SQL Server 2016 as a second instance next to SQL Server 2005. The steps for installing a new instance are almost the same as the steps for installing the SQL Server in a system where no other versions of SQL Server are present. Where applicable, the difference(s) will be highlighted in this document. Installing SQL Server 2016 The next step is installing SQL Server 2016. In a standalone environment, you have to perform these steps on the workstation where you work with Exact Globe Next. In all other cases, you have to perform these steps on the server. When working in a standalone environment, you will have one computer on which you are working with Exact Globe Next. On this computer, both Exact Globe Next and the SQL Server are installed. This is seen as a standalone even when your computer is part of a network, as all software needed to work with Exact Globe Next are installed on this one computer. Before installing the SQL Server, check the system requirements for the specific SQL Server edition at https://msdn.microsoft.com/en-us/library/ms143506(v=sql.130).aspx. When these requirements are met, you can start installing SQL Server 2016. To install SQL Server 2016: - Log in as an administrator on the server (of a workstation in case of a standalone installation).
- Insert the SQL Server installation DVD into your DVD drive. When the autorun is not performed, open the DVD drive in Windows Explorer and start the installation by clicking Setup.exe.
- The SQL Server Installation Center screen will be displayed. In this screen, you can view and execute several installation tasks.
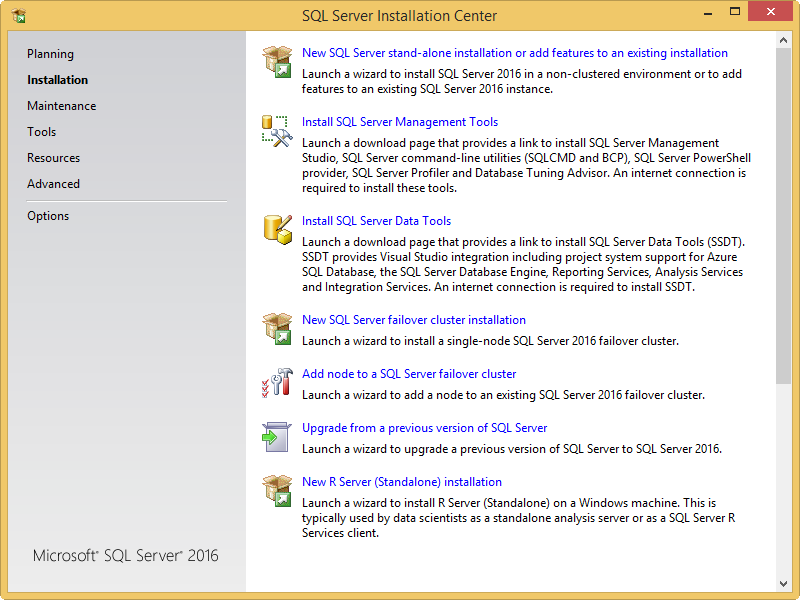 - Click Installation on the left panel. Next, click New SQL Server Stand-alone installation or add features to an existing installation.
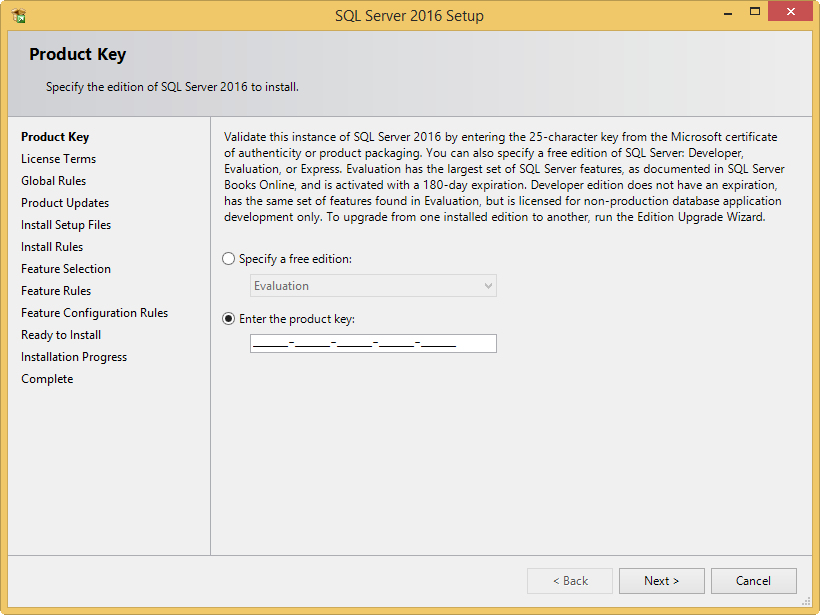 - In the Product Key screen, type the product key at Enter the product key if the product key is not filled automatically. Click Next to continue. The screen with the license terms will be displayed.
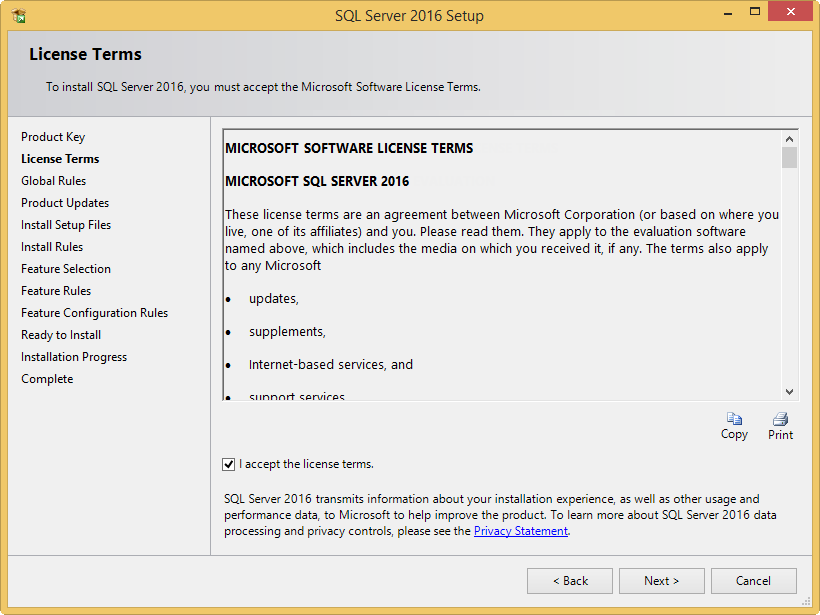 - To continue, select I accept the license terms and click Next.
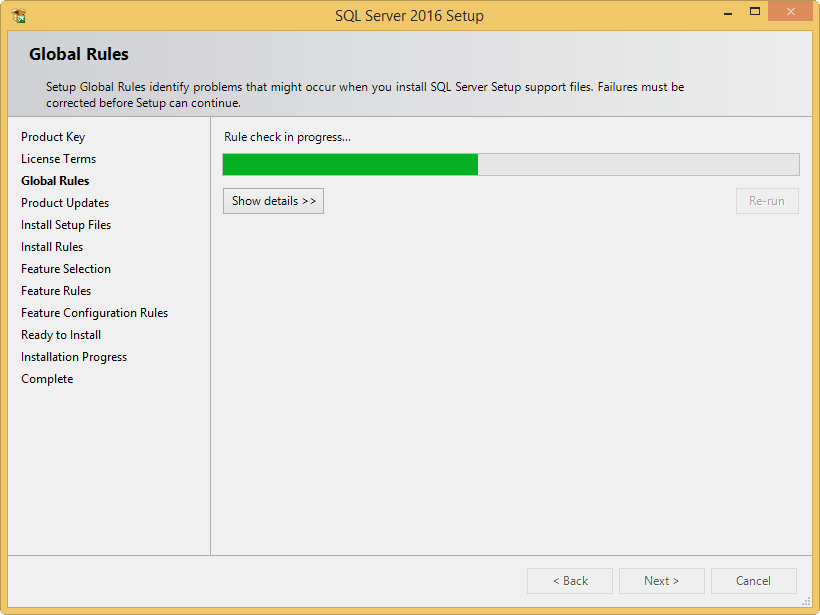 - Checks will be performed to identify possible problems when installing the SQL Server Setup support files. The SQL Server Setup support files are needed for the installation of MS SQL Server 2016 and are automatically installed via this installation wizard. Click Show details >> to view the details of these checks. When all checks are passed, the results are displayed in this screen. When a check has failed, a red icon will be displayed. You can click the link in the Status column for more information about the check and the error. After solving the issue, click Re-run to perform the checks again.
Note: It is possible that some warnings are displayed regarding the firewall. In spite of the warnings, it is still possible to continue with the installation. Depending on the situation, it is not necessary to close the installation wizard and restart. When all checks are passed, this screen will close automatically and the next screen will be displayed.
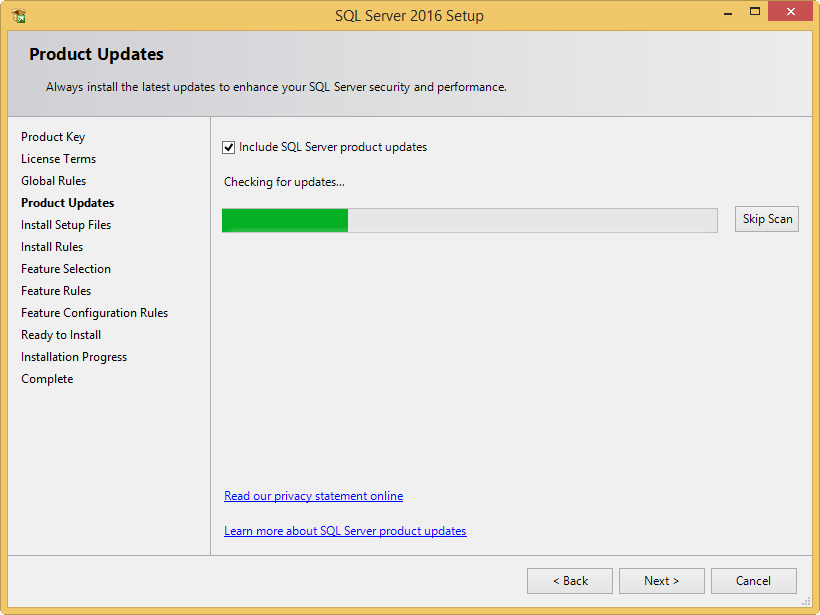 - The Product Updates screen allows you to check for new update files online. However, you can click Skip scan to skip this step. Click Next to continue.
 - The installation wizard will check for updates and install the available update files. As soon as this is done, the screen will close automatically and the next screen will be displayed:
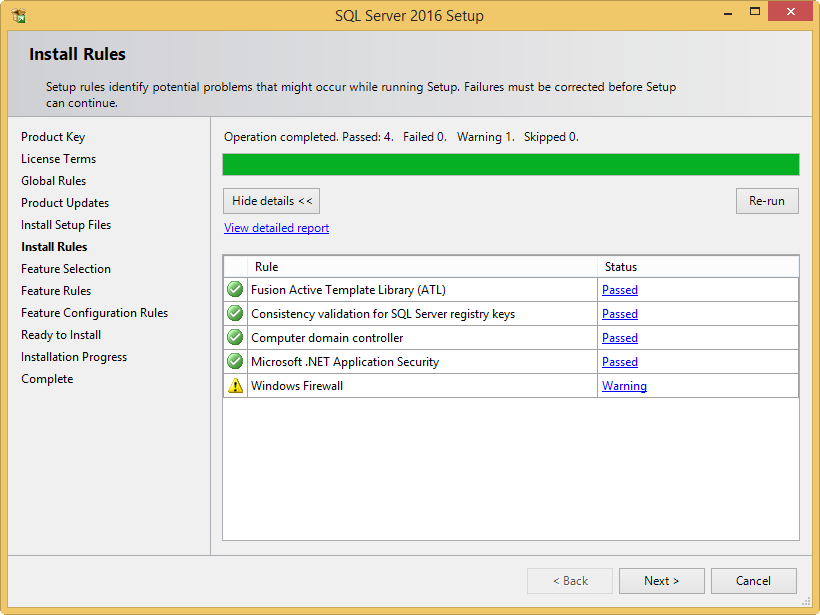 - Checks will be performed to identify potential problems that might occur during the installation. Click Show details >> to view the details of these checks. When a check has failed, a red icon will be displayed. You can click the link in the Status column for more information about the check and the error. After solving the issue, click Re-run to perform the checks again.
Note: Depending on the situation, it is not necessary to close the installation wizard and restart. - Click Next to continue. However, the Next button is available only when no checks have failed.
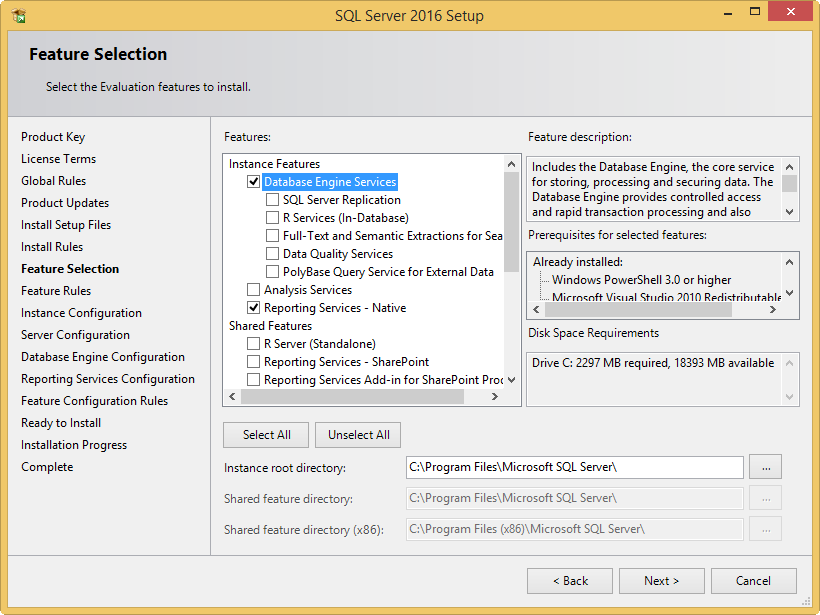 - Select the features to install. When you select a feature, the corresponding information about this feature will be displayed on the right. Select the following features:
- Database Engine Services
- Reporting Services - Native (applicable only when you are using SQL Server Reporting services and/or Exact Globe Next with extended functionality)
- Client Tools Connectivity
- Integration Services
- Documentation Components
- Full-Text and semantic extractions for Search: If you want to use the SQL full text search for searching feeds in the timeline of Exact Synergy Enterprise, this component should be selected. If you have not selected this component during the installation of the SQL Server, you can install it at a later time. For more information, see Defining social collaboration settings.
Besides selecting the features, you do not have to change anything else. Click Next to continue.
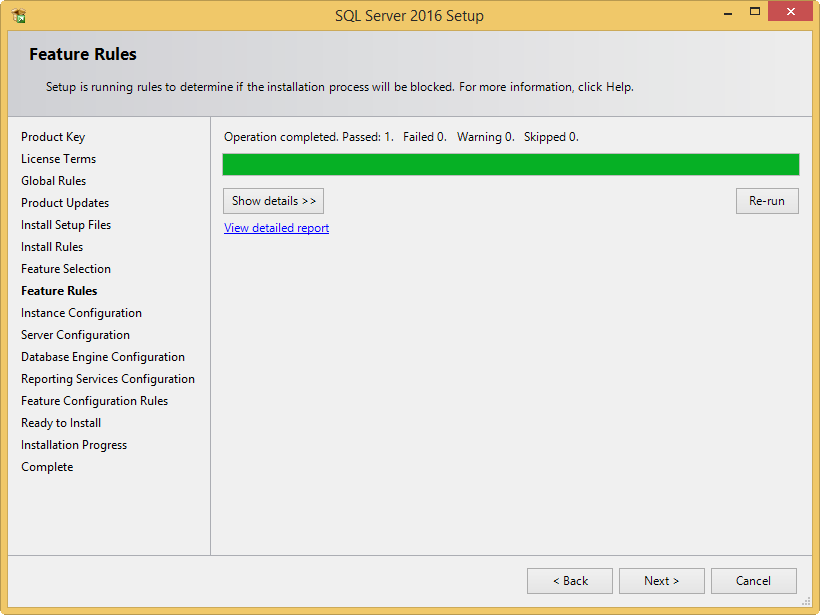 - Checks will be performed to identify issues that might block the installation. Click Show details >> to view the details of these checks. When a check has failed, a red icon will be displayed. You can click the link in the Status column for more information about the check and the error. After solving the issue, click Re-run to perform the checks again.
Note: Depending on the situation, it is not necessary to close the installation wizard and restart.
- Click Next to continue. However, the Next button is available only when no checks have failed.
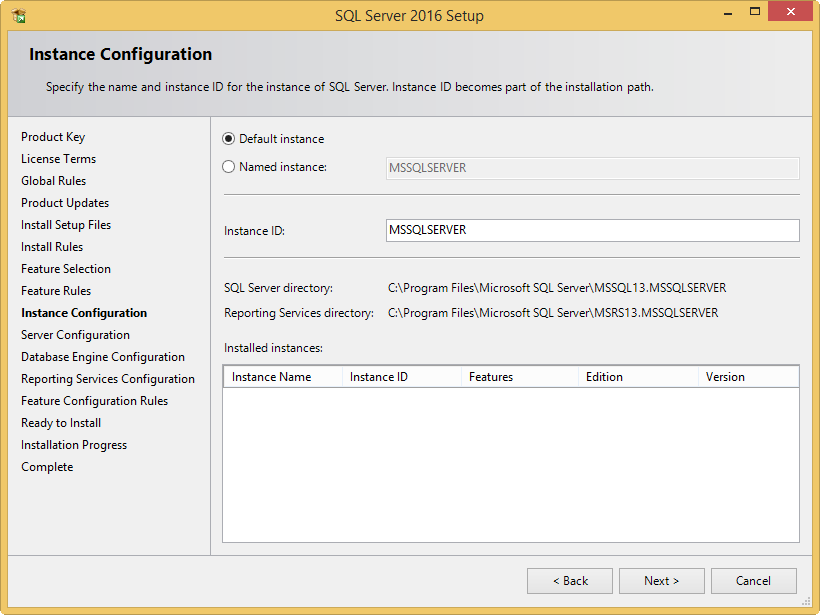 - When the actions in the previous screen are completed, the screen will close automatically and the next screen will be displayed. In the Instance Configuration screen, define a name for the instance. This is the name for your SQL Server. Click Next to continue.
Note:
- New installation — When it is a new installation, there is no SQL Server present in your system yet. In this case, select Default instance. There is no need to change anything else in the screen. At the bottom of the screen, you can see if there are already other SQL Server instances present. When this is a new installation in a system where no SQL Server is present yet, this part of the screen is empty.
- Installingnew instance — When there are existing SQL Server installations present, you have to select Named instance and define a name in the box next to it, for example "SQL2016". The name defined here has to be unique and cannot be the same as the name of the other instances that are already present on your system. The field Instance ID will be filled automatically and you do not have to change this manually. At the bottom of the screen, you can see if any other instances are present.
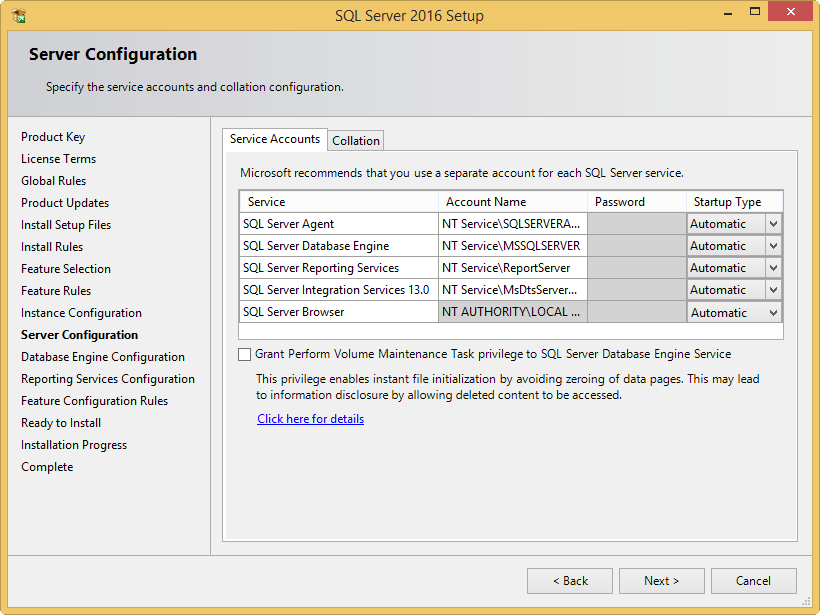 - In this screen, under the Service Accounts tab, you can define which account you want to use for starting the MS SQL Server 2016 services. For a standard installation, accept the data as suggested in the screen. Keep in mind that when you select a user for which the password regularly changes, you will also have to change the password in the services every time. If you forget to change the password in the services, the services cannot be started and you will not be able to use the SQL Server until you have updated the password in the services, and have started the services. Depending on the account selected at Account Name, you have to enter the corresponding password at Password.
- In the Startup Type column, you can define that the service has to start automatically when the system starts. The SQL Server Database Engine is the SQL Server itself. This service should always be started in order to use the SQL Server.
The SQL Server Browser service is a service that is used for identifying the ports that the installation of SQL Server listens to. This service needs to be started to enable network access. The Startup Type option of this service should be Automatic. The account name of this service cannot be changed.
 - Under the Collation tab, you can define the collation (character set) settings. For Western European countries, you can accept the collation as displayed in the screen. Click Next to continue. The following screen will be displayed:
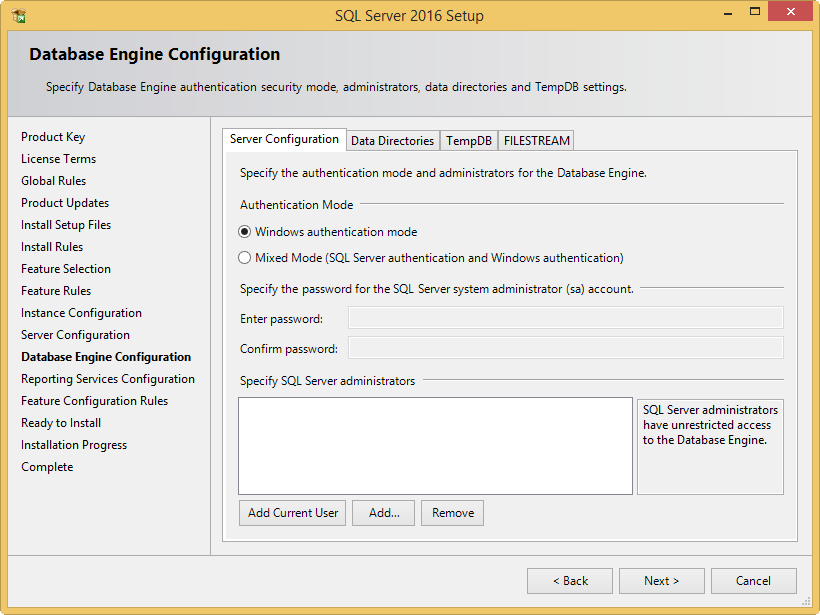 - Under the Server Configuration tab, define how you would like to log on to the SQL Server. When you are working with Exact Synergy Enterprise and/or Exact Globe Next with extended functionality, select Mixed Mode (SQL Server authentication and Windows authentication). Type your password at Enter password and Confirm password. This password is a password that will be used for the SA user; this default user is the System Administrator within the SQL Server. If you select Windows authentication mode, you do not have to type a password.
Note: Regardless of which Exact product you use, you will always have to define one user or more at the bottom of the screen. These users will be administrators on the SQL Server. You have to select at least one user. This user will be the administrator on the SQL Server and can also add other users later on. - Click Add Current User to add the users that are currently performing the installation as an administrator. Click Add to add other users or Remove to remove selected users.
- Click Next to continue.
Note: The following screen will be displayed only if you have selected the Reporting Services – Native feature.
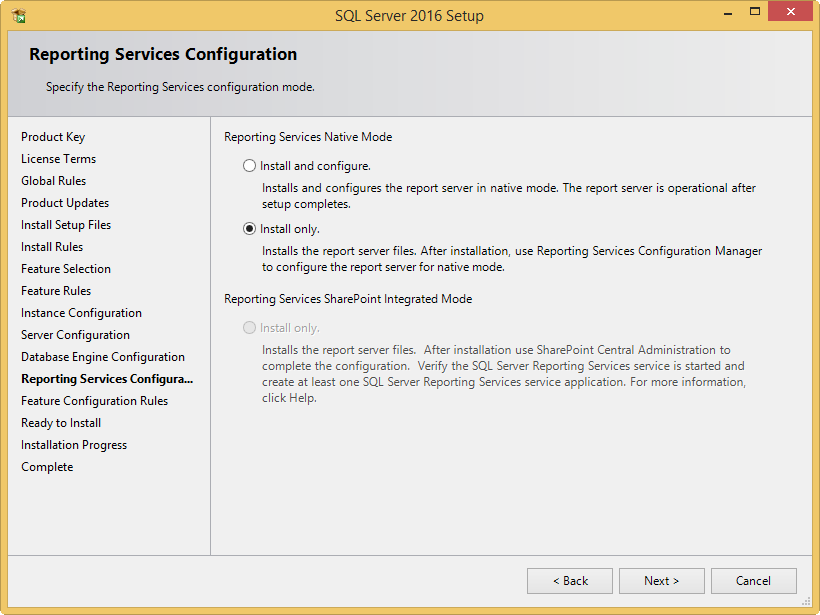 - In this screen, define if you want to configure the reporting services feature now or if you want to configure it later. Select Install only to install the feature and configure it later. Click Next to continue.
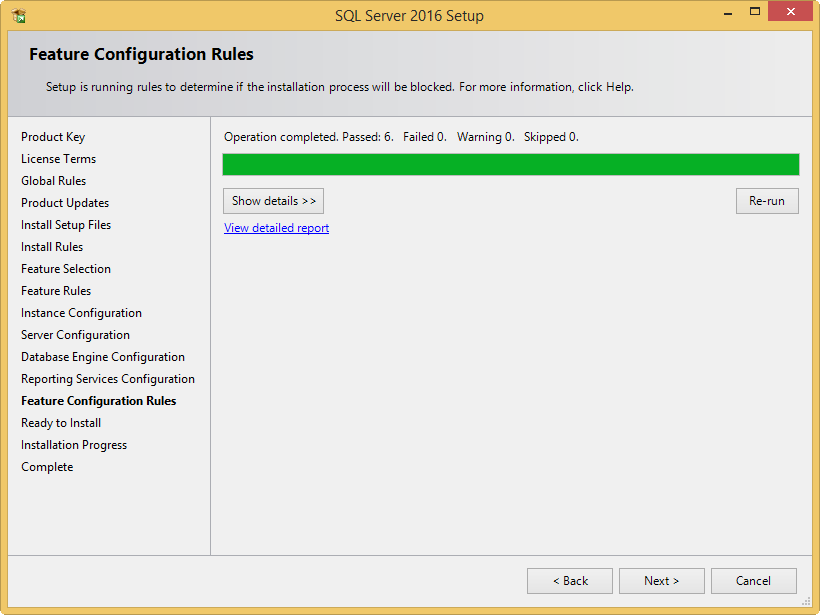 - In the Feature Configuration Rules screen, checks will be performed for problems that might occur during the installation. Click Show details >> to view the details of these checks. When a check has failed, a red icon will be displayed. You can click the link in the Status column for more information about the check and the error. After solving the issue, click Re-run to perform the checks again.
Note: Depending on the situation, it is not necessary to close the installation wizard and restart. - Click Next to continue. However, this button is available only when no checks have failed.
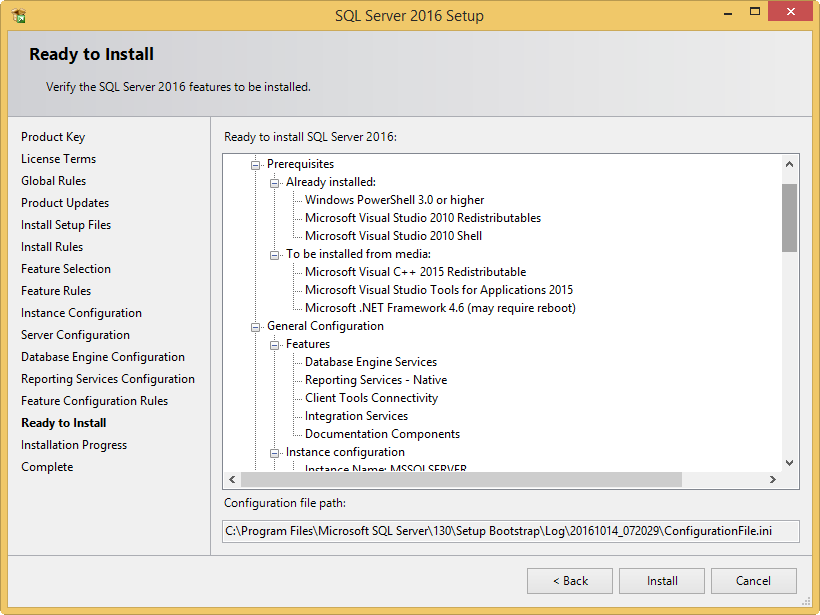 - In the Ready to Install screen, a summary of the defined installation criteria will be displayed. Click Install to start the installation.
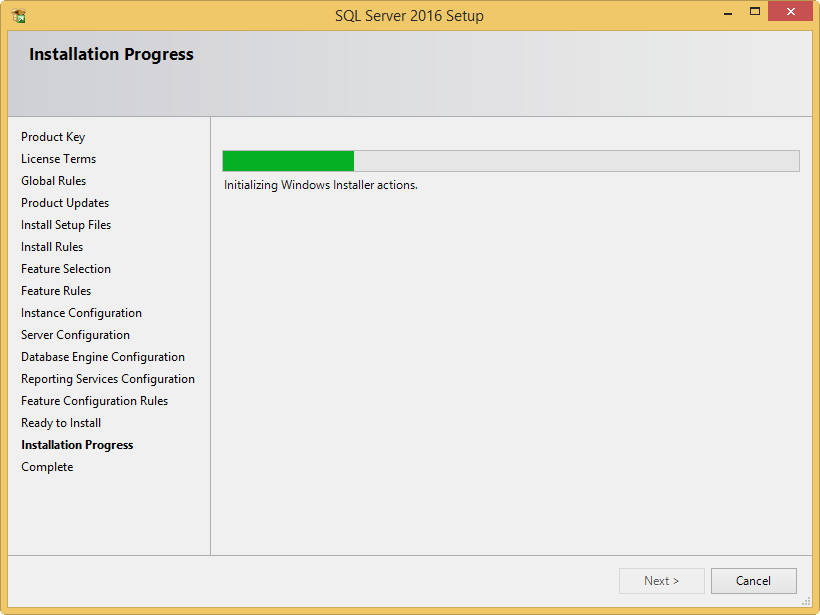 - The screen displaying the progress of the installation will displayed. The installation might take some time.
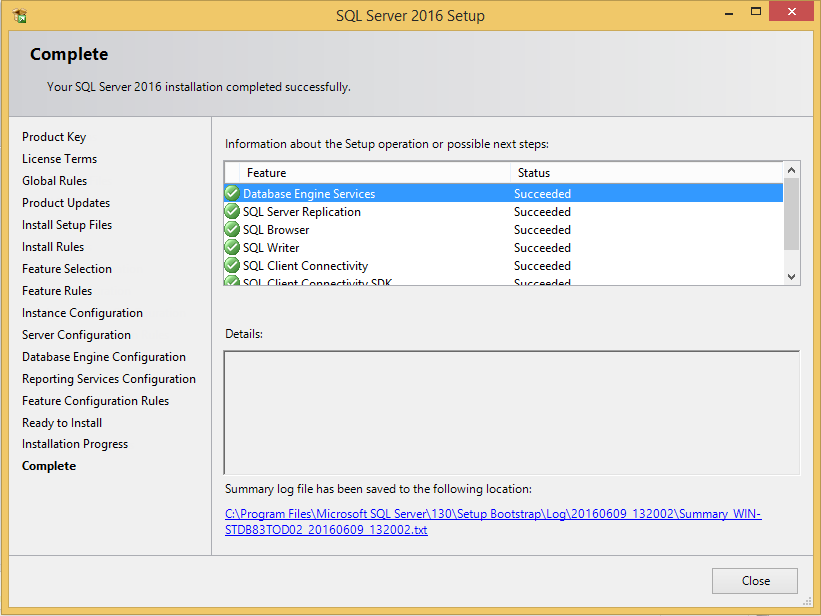 - As soon as the installation has completed successfully, the installed components are displayed with a green icon. Click Close to close the wizard.
- To be able to access the SQL Server via a network, you have to activate some protocols. When working with a network environment, you have to check if the protocols are activated. If required, activate the protocols.
- Start (on the server where MS SQL Server 2016 is installed) SQL Server Configuration Manager. In Windows, go to Start, select All Programs, followed by Microsoft SQL Server 2016. Click Configuration Tools, and then SQL Server 2016 Configuration Manager.
In Windows 8, press the Windows key and the Q key on your keyboard. On the right at Search at the Apps field, type "SQL Server Configuration Manager". Next, click SQL Server 2016 Configuration Manager. - Click SQL Server Network Configuration.
- Select Protocols for xxxx. ("xxxx" has to be replaced by the name you have defined for the SQL Server during installation).
- Right-click the protocols Named Pipes and TCP/IP and click Enable to enable these protocols.
 - You might also need to start the SQL Server Browser service. This service is used for identifying the ports that the installation of SQL Server listens to. When this service is not started, you can use the SQL Server only locally. To check if this service is started, follow these steps:
- Start (on the server where MS SQL Server 2016 is installed) SQL Server Configuration Manager. In Windows, go to Start, select All Programs, followed by SQL Server 2016. Click Configuration Tools, and then SQL 2016 Server Configuration Manager.
In Windows 8, press the Windows key and the Q key on your keyboard. On the right at Search at the Apps field, type "SQL Server Configuration Manager". Next, click SQL Server 2016 Configuration Manager on the left side of the screen. - Click SQL Server Services.
- On the right side, the SQL Server Browser service is displayed.
Note: When it is not started, the icon is red. When it is started, the icon is green. Ensure that the service starts automatically so that every time the system is restarted, the service will also start. - Right-click SQL Server Browser and select Properties.
- In the SQL Server Browser Properties screen, click the Service tab.
- At Start Mode, select Automatic, as displayed in the following screen:
 - Click Apply to apply the changes. The SQL Server Browser service will now start automatically every time the system is started.
- Next, start SQL Server Browser.
- In the SQL Server Browser Properties screen, click the Log On tab.
- Click Start to start the service. When the Start button is inactive, the SQL Server Browser service is already started and you do not have to start it.
Note: When you have a firewall, you have to configure the firewall to allow connections with SQL Server 2016. The default port for SQL Server 2014 is 1433. The SQL browser used UDP port 1434. Installing SQL Server Management Studio The next step is to install SQL Server Management Studio. SQL Server Management Studio is an application for managing the SQL Server. With SQL Server Management Studio, you can create and restore backups, change database settings, and give users SQL Server rights. - Log in as an administrator on the system where you have installed SQL Server 2016.
- The setup file for SQL Server Management Studio can be downloaded from the Microsoft website (https://msdn.microsoft.com/library/mt238290.aspx). Place this file on the system where MS SQL Server 2016 is installed.
- Start the installation by double-clicking the downloaded file.
The following screen will be displayed:
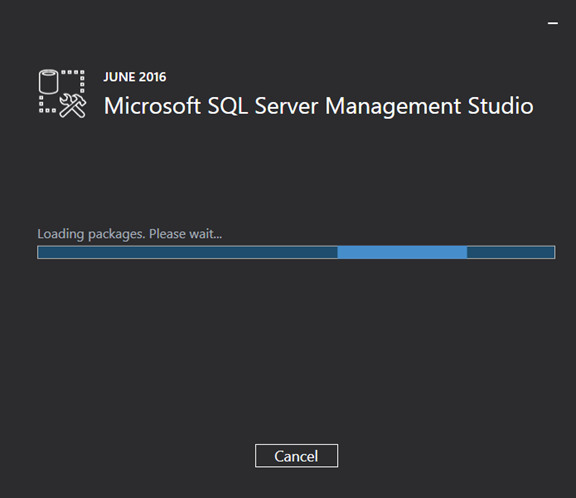
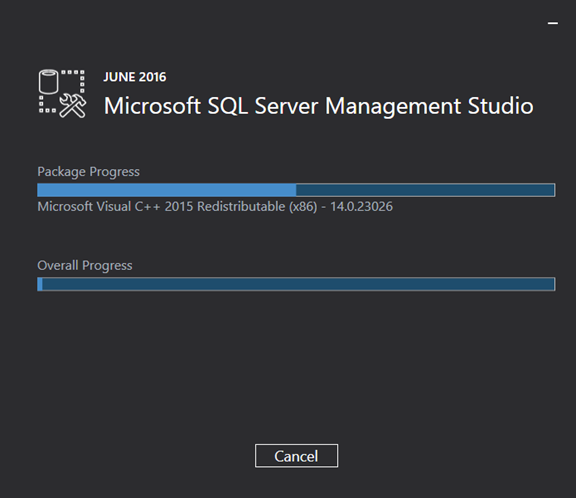
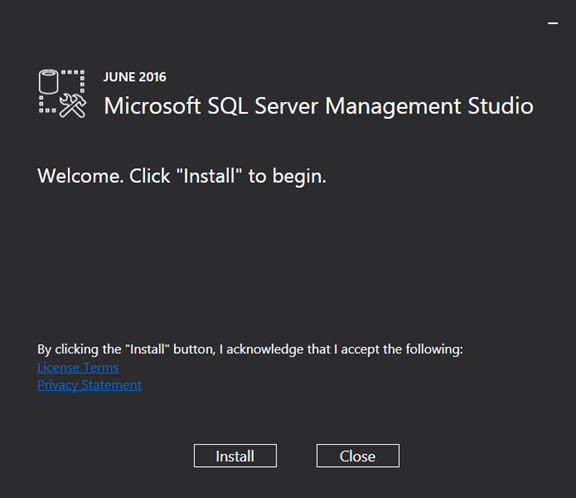 Click Install to start the installation. During the installation, you can follow the progress of the installation. The following screens will be displayed. The installation can take some time.
  When the installation is completed, the following screen will be displayed. You have to restart the system to complete the setup. 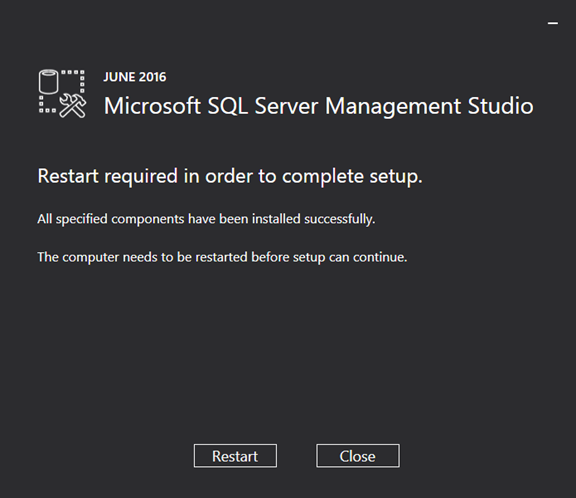 Related documents - Exact video library
- How-to: Upgrading SQL Server 2016
| Main Category: | Support Product Know How | Document Type: | Online help main | | Category: | On-line help files | Security level: | All - 0 | | Sub category: | Details | Document ID: | 27.342.366 | | Assortment: | Exact Synergy Enterprise | Date: | 15-01-2018 | | Release: | | Attachment: | | | Disclaimer | |


0 Response to "How To Create New Instance In Sql Server 2016"
Post a Comment